Login to your account via your white label URL (agency.reportingspot.com) using your BringShare credentials. Follow the steps below to fully customize and schedule an automated report.
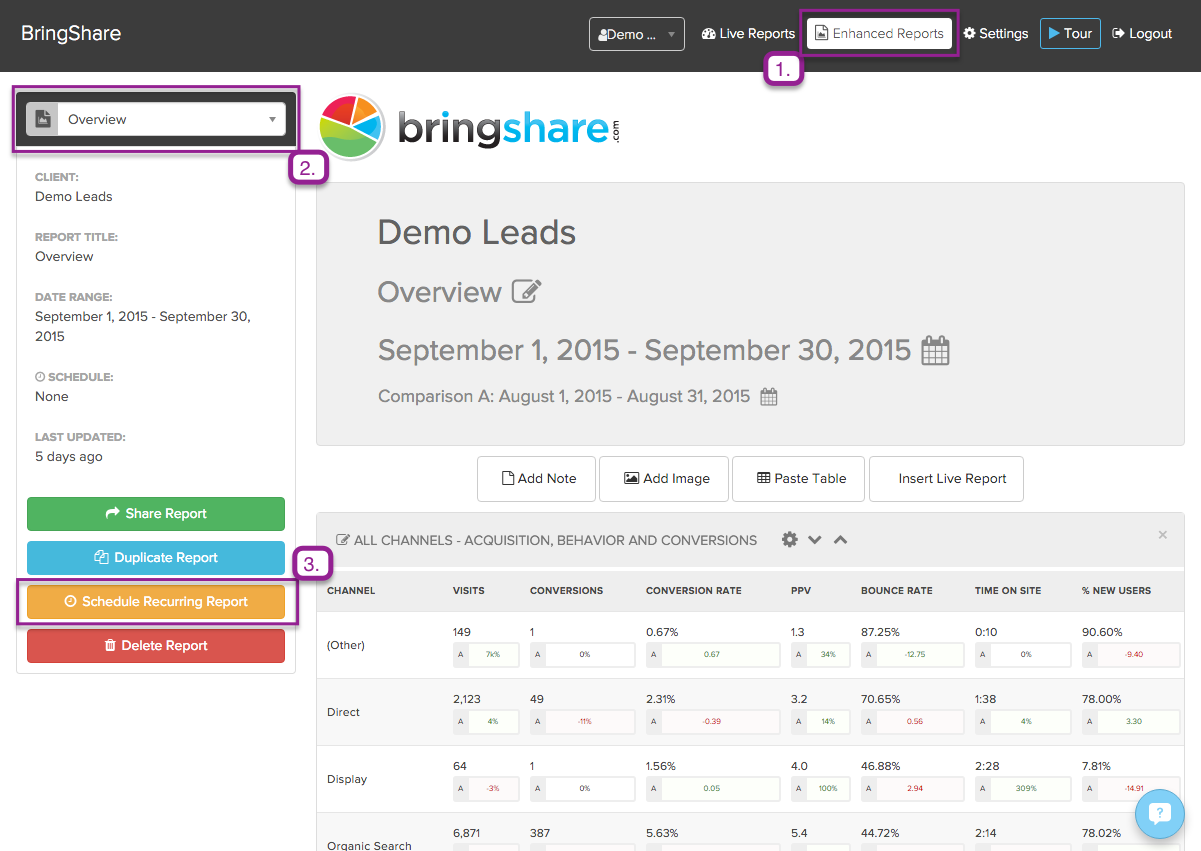
- Navigate to the “Enhanced Reports” dashboard at the top of the page
- Select a previously created Enhanced Report from the dropdown menu
- Click the orange “Schedule Recurring Report” button on the left side and a menu will open
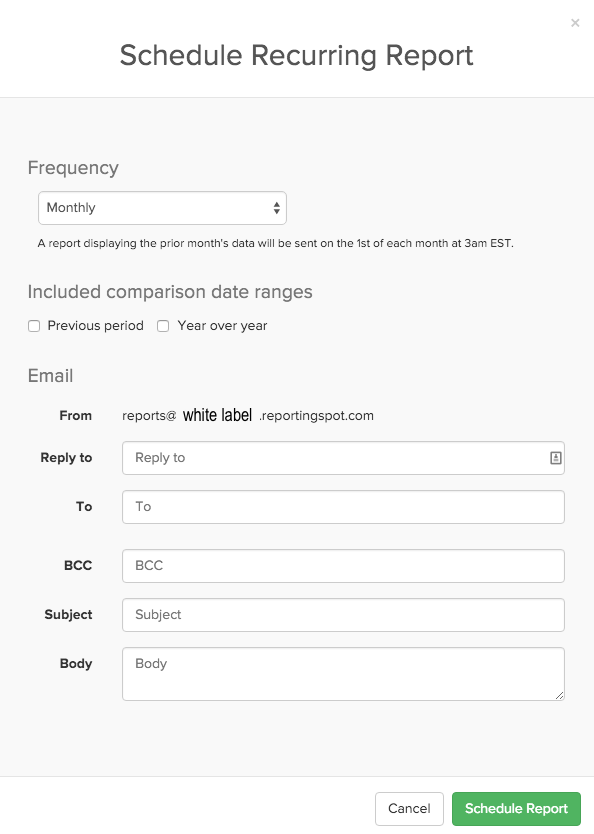
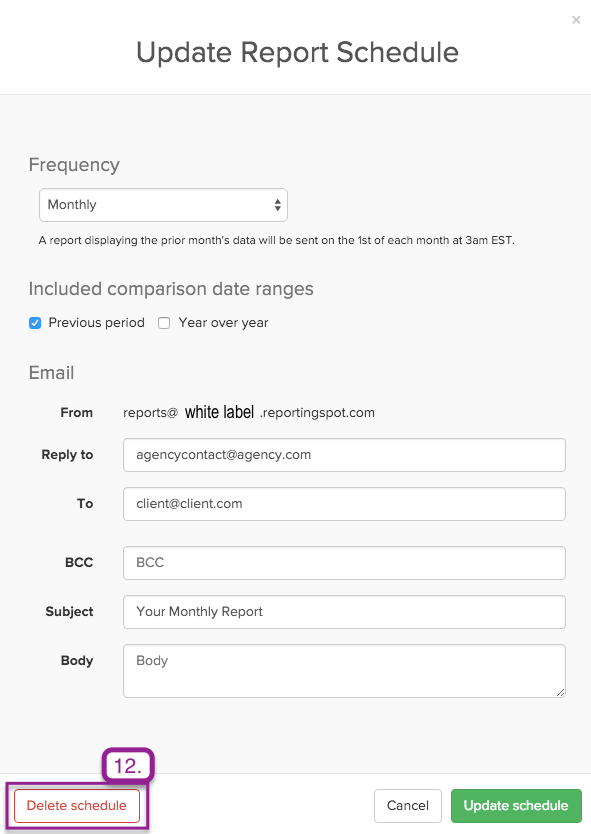
This is the “Schedule Recurring Report” menu. This is where you’ll set report frequency, include comparison data, and setup email information.
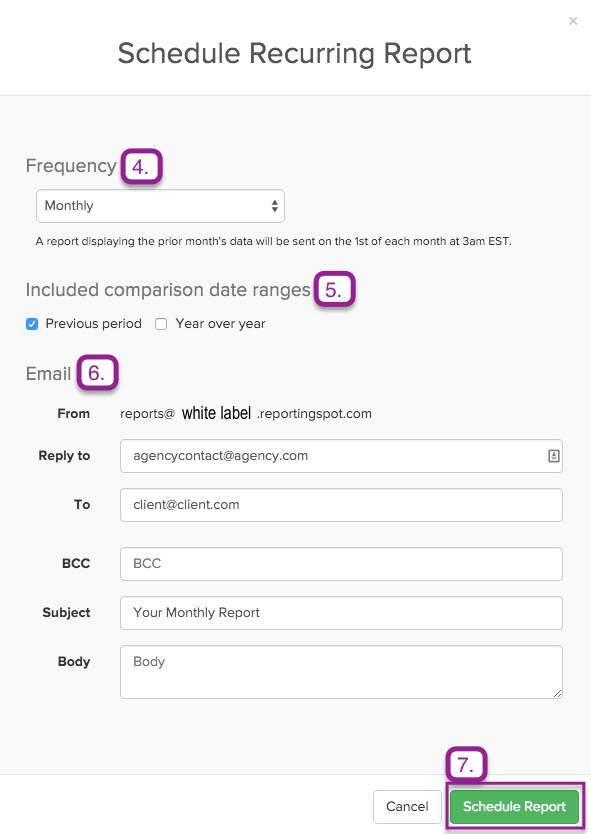
4. The first step to scheduling a Recurring Report is setting the frequency
- Daily reports are sent out each day and display the previous day’s data.
- Weekly reports are sent out on the selected day and display the previous 7 days’ of data.
- Monthly reports are sent out on the 1st of each month and display the previous month’s data.
- Quarterly reports are sent out 4 times a year; on April 1st, July 1st, October 1st, and January 1st and display the previous 3 months of data.
5. You can also include comparison date ranges, previous period and/or year over year.
6. The only required field to schedule the report is “To” but BringShare gives you a few options to customize the email.
- To: Client’s email to send the report to. To add multiple recipients, separate email addresses with a comma
- Reply To: Who, from your company, will receive a response to the report email
- BCC: Blind carbon copy, add someone from your organization to ensure report quality
- Subject: Email subject
- Body: Include any additional information, who sent the report, contact information, etc.
7. After reviewing everything, click the green “Schedule Report” button at the bottom of the modal to finalize the report.
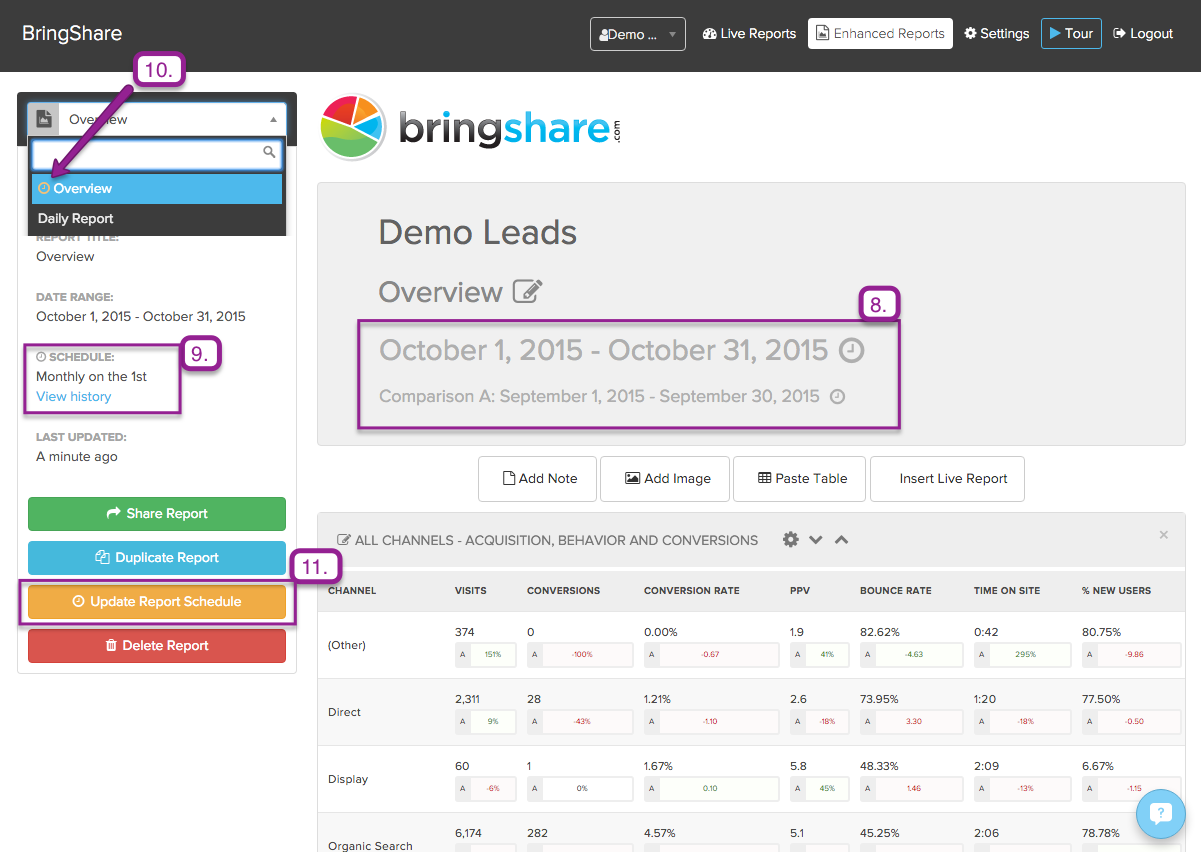
8. Your Recurring Report is now scheduled. The report will update to show the date range of the next report that will be sent.
9. The “Schedule” will update to show the sending frequency and date the report will be sent on. As reports are sent, the “View History” will populate with past reports.
10. Scheduled reports will have a clock next to them in the Enhanced Reports dropdown.
11. To update the scheduled report, click the orange “Update Report Schedule” button (previously the “Schedule Recurring Report” button).
12. To stop sending the report, click “Delete schedule” on the bottom left of the modal. You will have to confirm you want to stop sending the report by clicking this button again. The report will still be saved as an Enhanced Report and can be updated at a later time.
Let us know if you have any questions. We’re happy to help.